
The Aeropress is a popular and easy-to-use method for making coffee, especially when traveling or camping. Here is a step-by-step guide on how to make coffee using the Aeropress method:
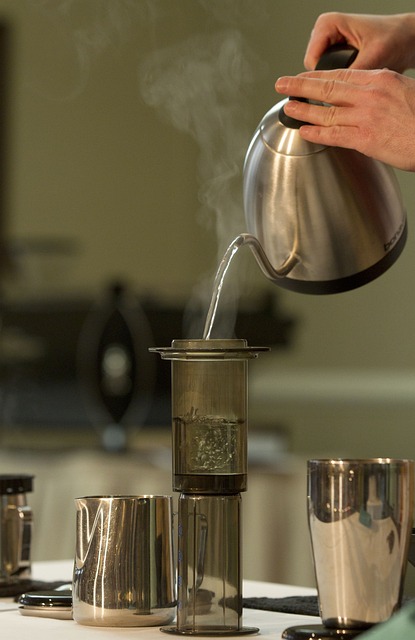
- Begin by heating up some water. The ideal brewing temperature for coffee is around 93°C, so aim for slightly below boiling point.
- As the water is heating, grind your coffee beans. For the Aeropress, a medium-fine grind is best. You’ll need around 15-17 grams of coffee for a standard Aeropress.
- Place the Aeropress on a stable surface, with the plunger facing upwards. Assemble the Aeropress by attaching the rubber seal to the bottom of the plunger and then screwing the plastic filter cap onto the bottom of the chamber.
- Place a paper or metal filter into the filter cap. If using a paper filter, rinse it with hot water to remove any paper taste and to help it stick to the cap.
- Add the ground high quality coffee beans to the chamber of the Aeropress.
- Pour the heated water into the chamber, making sure to wet all the grounds.
- Allow the coffee to steep for around 1 minute.
- Place the Aeropress on top of your mug or carafe, making sure the spout is facing downwards. Slowly press down on the plunger to push the brewed coffee through the filter and into your mug.
- Once all the coffee has been pressed through, discard the used grounds and rinse the Aeropress with hot water.
And that’s it! You now have a delicious cup of coffee made with the Aeropress method. Experiment with the amount of coffee and steeping time to find the perfect brew for your taste preferences. Enjoy!